✔ Competitive Pricing ✔ Quality Service ✔ Extensive Stock ✔ Experienced Staff


 01726 828 388


Reset Filter
Bandsaw Blades - Choosing and Fitting
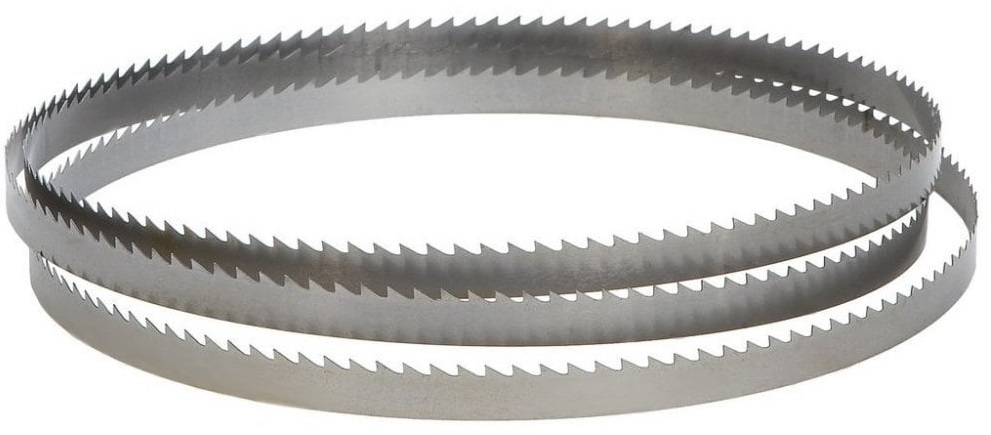
Bandsaw Blades
A guide to bandsaw blades and how to choose the correct blade for your application.
Bandsaw blades are the cutting tool of the bandsaw, and their design determines how fast you cut, how smooth the cut is, how tight a curve you can make, and how long the blade lasts. Choosing the right blade matters as much as choosing the saw itself.
How to Choose the Correct Bandsaw Blade for Your Project
Choosing the right bandsaw blade is one of the most important decisions you’ll make in the workshop. The blade, not the saw, largely determines cut quality, accuracy, speed, and safety. A poor blade choice leads to burning, wandering cuts, rough surfaces, and broken blades.
1: Confirm the correct blade length
Every bandsaw requires a specific blade length.
Check your bandsaw manual.
Look for a label on the saw frame.
Search by make and model on the manufacturer’s website.
Using the wrong length prevents proper tensioning and can cause tracking issues or blade failure.
2: Decide what type of cut you’re making
Blade choice starts with the cut, not the material.
For straight cuts and resawing: Prioritise stability and use the widest blade your saw allows.
For curves and shaping: Prioritise flexibility and use a narrower blade that can follow the curve.
3: Choose the correct blade width
Blade width controls how tight a curve you can cut and how straight the blade tracks.
1/8" - 1/4" for tight curves and scroll‑like work.
3/8" - 1/2" for general‑purpose cutting.
3/4" - 1" for straight ripping and resawing.
Wider blades resist twisting and drift; narrower blades turn more easily.
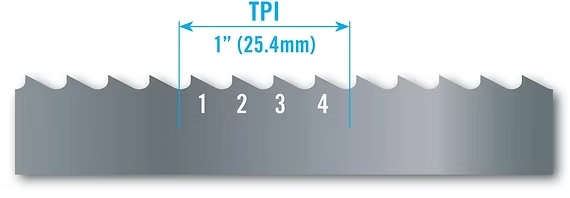
4: Match TPI (teeth per inch) to material thickness
TPI determines cut speed vs surface finish.
Low TPI (2 - 4 TPI) for thick wood and resawing, fast but rough cuts.
Medium TPI (6 - 10 TPI) for general woodworking, balanced speed and finish.
High TPI (10 - 14+ TPI) for thin material and smooth cuts, slower feed.
Tip: Keep at least 2–3 teeth in the cut at all times to avoid vibration and tooth damage.
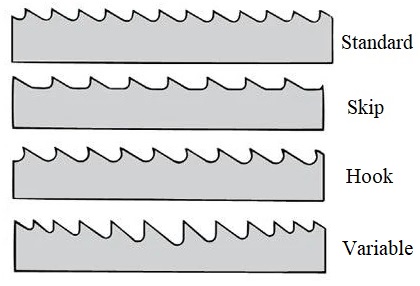
5: Select the tooth shape
Tooth shape affects how aggressively the blade cuts and how well it clears sawdust.
Regular tooth: Smooth cuts, general use.
Skip tooth: Better chip clearance, good for softwood and resawing.
Hook tooth: Aggressive cutting, best for thick or hard stock.
Variable pitch: Reduces vibration and improves straight tracking.
6: Choose the blade material
Blade material affects lifespan and cost.
Carbon steel: Most common for woodworking, flexible and affordable.
Bi‑metal: Longer‑lasting, mainly used for metal.
Carbide‑tipped: Extremely durable, ideal for dense or abrasive woods and frequent resawing.
Still unsure?
If you want one blade that handles most tasks reasonably well, choose the following specifications:
* 1/2" wide
* 3 - 4 TPI
* Skip or variable tooth
* Carbon steel
This setup works for straight cuts, gentle curves, and light resawing without constant blade changes.
You can use the filters on our website to search for the specific blade you need!
Simply type bandsaw blade into the search box:
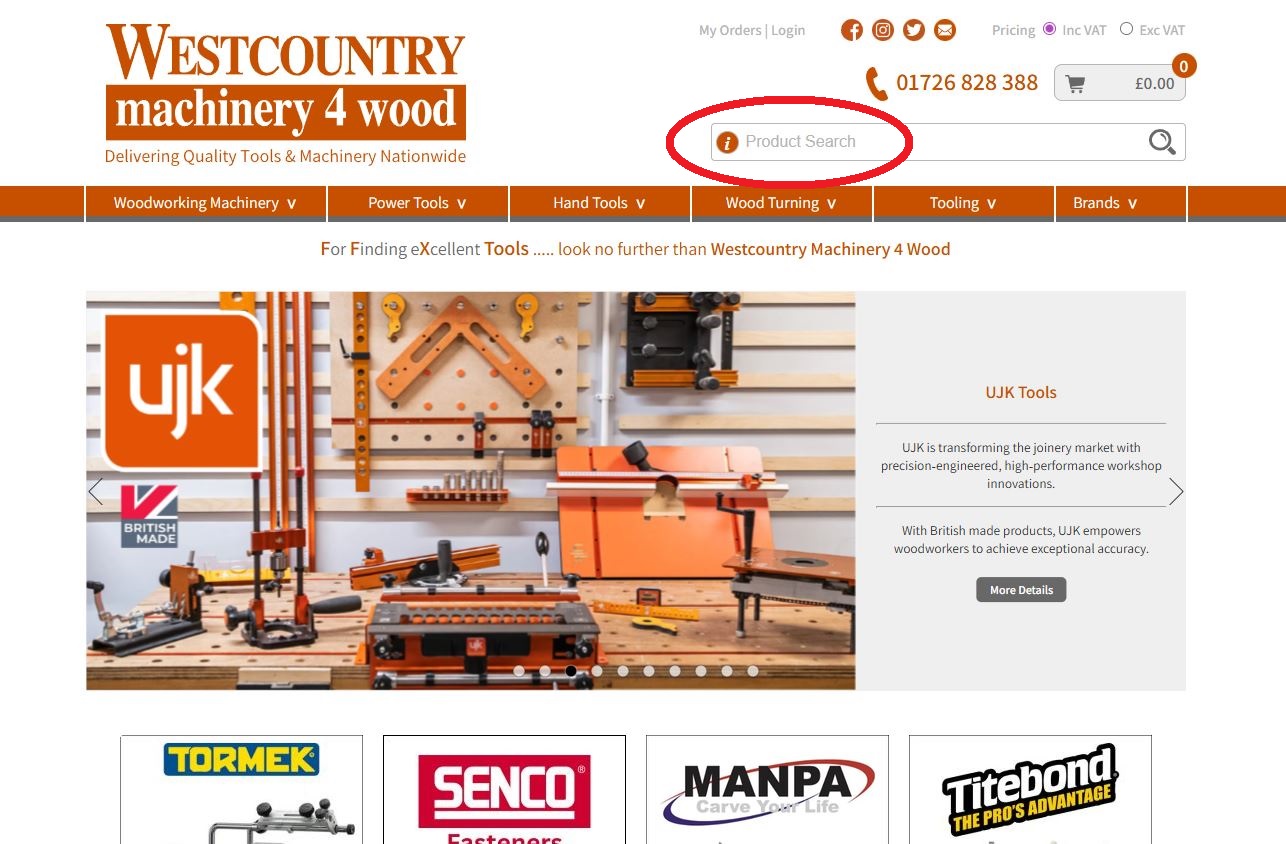
Then use the filters in the drop-down menu to refine by length, width, TPI etc:

Changing the Bandsaw Blade
Changing a bandsaw blade is a normal, safe maintenance task if you follow the steps in the right order. Always check your saw’s manual for model‑specific details, but the following steps are widely used and documented.
Safety First
Unplug the bandsaw (don’t rely on the switch alone).
Wear gloves and eye protection (bandsaw blades are springy and sharp).
Clear the table and open the upper and lower wheel doors.
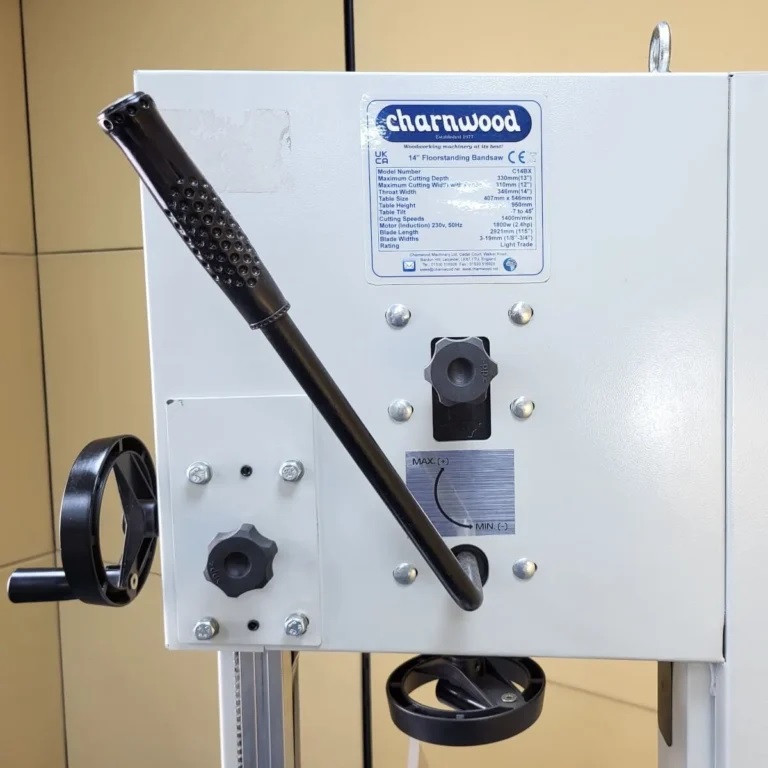
1. Release blade tension
Turn the tension knob (usually on top of the saw) or use the quick‑release lever if your saw has one.
Continue until the blade is loose and floppy on the wheels.
2. Raise and loosen the blade guides
Raise the upper blade guide to its highest position.
Back off the side guides and thrust bearings (above and below the table) so the blade can move freely.
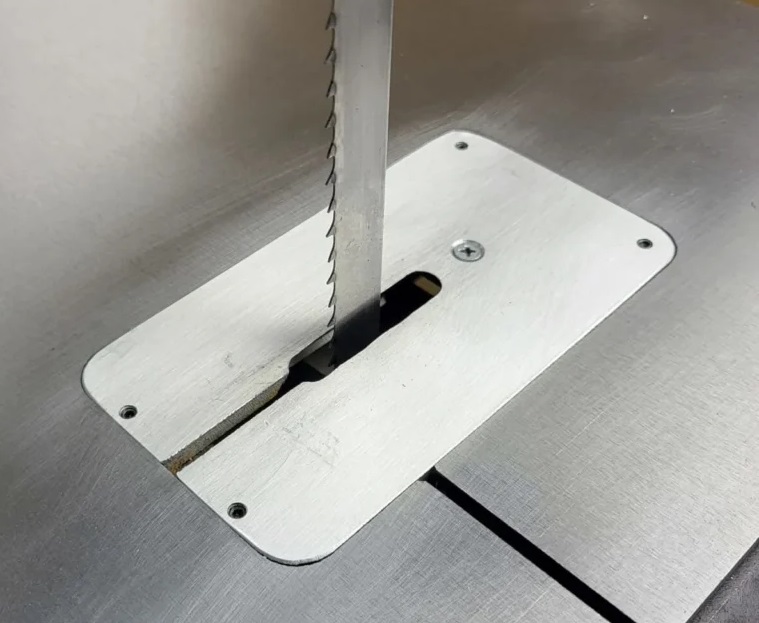
3. Remove the table insert (throat plate)
Lift out the round or oval table insert around the blade slot.
Some saws also have a small table alignment pin, remove it if present.
4. Remove the old blade
Carefully lift the blade off the wheels.
Thread it out through the table slot.
Coil it carefully for disposal or storage (keep control, it can spring open).
5. Install the new blade
Make sure the teeth point downward toward the table (this is critical).
Feed the blade through the table slot.
Place it over the upper and lower wheels, centered on the tire crown.
6. Re‑tension the blade
Slowly apply tension using the tension knob or lever.
Use the tension scale as a rough guide only (it’s not perfectly accurate).
7. Set blade tracking
Rotate the upper wheel by hand.
Adjust the tracking knob so the blade runs in the center of the wheel.
Keep turning the wheel until the blade stays stable.
8. Reset blade guides
Bring the side guides close to the blade (not touching).
Set the thrust bearing just behind the blade.
Repeat for upper and lower guides.
9. Reinstall the table insert and close doors
Replace the throat plate and any pins.
Close and latch both wheel doors.
10. Test run
Plug the saw back in.
Stand to one side and briefly power it on.
Watch for smooth tracking and unusual vibration.
Shut off immediately if the blade wanders or makes noise.
Common mistakes to avoid
Installing the blade backwards (teeth up instead of down).
Forgetting to loosen the guides before removal.
Over‑tensioning the blade.
Powering on with doors open.
See our full range of bandsaw blades
If you need some help choosing a bandsaw blade, feel free to contact us on 01726 828388 or email us at info@machinery4wood.co.uk.
No items in this category